


CHAIN WITH BLACK, WHITE & GREY MIX 2 WRAP LEATHER BRACELET (CHAN LUU STYLE) TUTORIAL
MATERIALS NEEDED

4mm faceted round hematite beads (6 pieces)

4mm chalk white swarovski element round beads (6 pieces)

4mm faceted round larvikite round beads (6 pieces)

4mm faceted round clear quartz beads (6 pieces)

4mm faceted round onyx beads (6 pieces)

4-5mm (width) flat curb chain (7 inches)

unwanted thread (12-24 inches)

sterling silver oval-shaped button (1 piece)

1.5mm natural black leather cord (4 feet)

clipboard (1)

black silk thread (9 metres)

2.125 inch big eye needle (1)
Estimated duration: 3-4 hours
Estimated cost: USD28.00
STEP 1: PREPPING THE THREAD
Cut the 9 metre long black silk thread into one 3.5 metre length and one 5.5 metre length. Cut the 5.5 metre long black silk thread into equal halves and fold them in half. Thread the U-shaped end through the big eye needle. Fold the U-shaped end towards the loose ends of the black silk thread and pick up by the "Y" intersection to form a loop. This way, you'll be threading beads with 4 strands of black silk thread later.


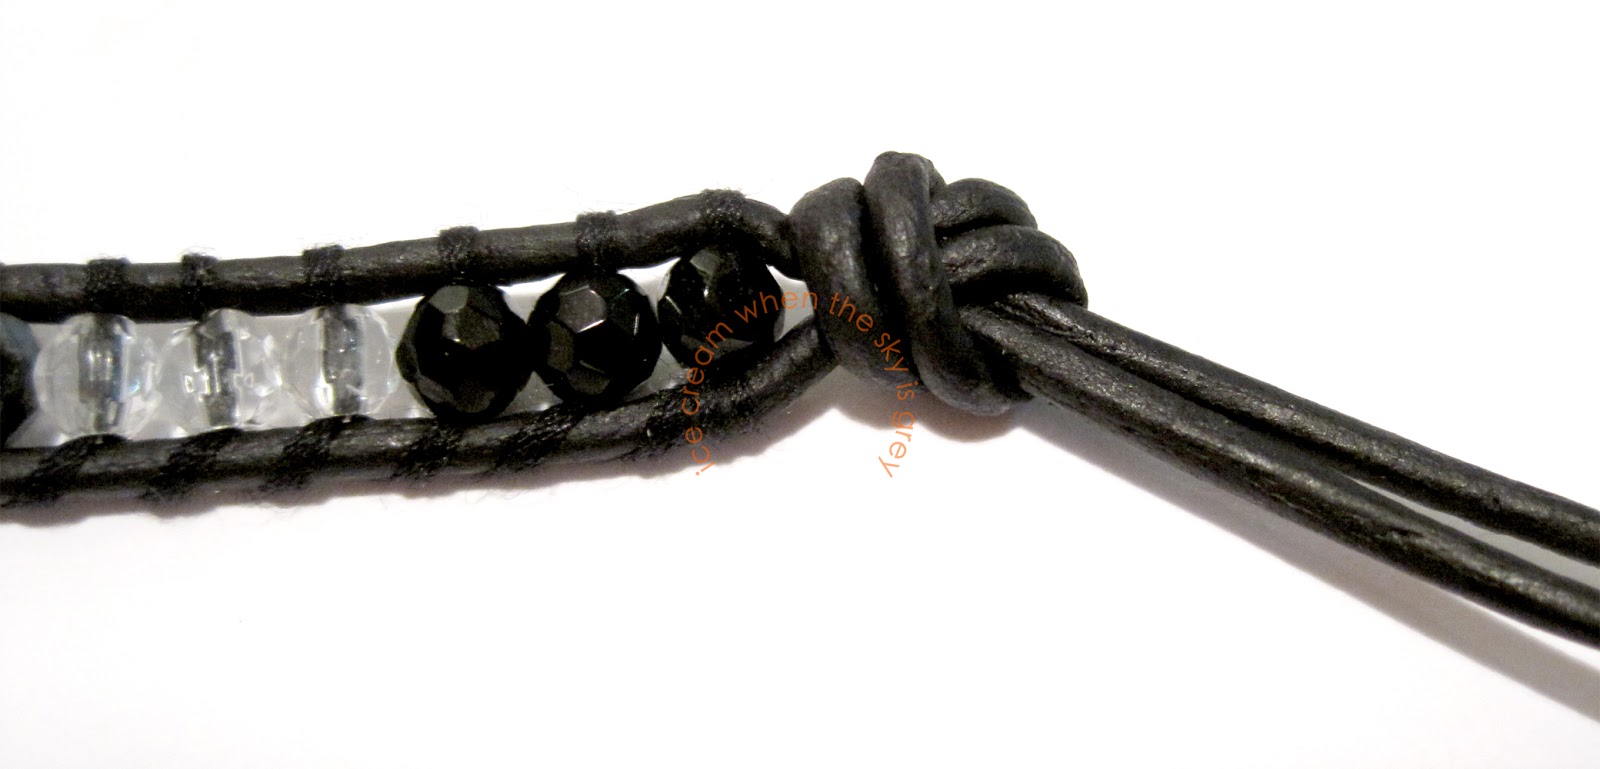
Fold the natural black leather cord into equal halves and thread the loose ends through the concave side of the sterling silver oval-shaped button. Secure it with the clipboard. I positioned mine with the sterling silver oval-shaped button on my left, and the loose ends of the natural black leather cord on my right. Thread the bottom natural black leather cord through the loop we have created with the silk thread and fasten the loop approximately 5-10mm away from the back of the sterling silver oval-shaped button (convex side).


Thread 3 of the following beads respectively:
• 4mm faceted round hematite
• 4mm round chalk white swarovski elements
• 4mm faceted round larvikite
• 4mm faceted round clear quartz
• 4mm faceted round onyx


TIPS: TECHNIQUE & TENSION
You should be threading the beads in a figure-8 method. Also, proper tension is key to a straight bracelet, I tug the natural black leather cord firmly, supporting the "back" of each bead while tightening the silk thread that loops around the black leather cords. Making sure the bracelet is parallel to the sides of the clipboard, and the 4 strands of silk thread are perpendicular to the sides of the clipboard helps too.


STEP 4: SECURING THE CHAIN
Use a portion of the unwanted thread and thread it through the 1st link of the flat curb chain. Thread one end of the unwanted thread between the 1st and 2nd faceted round onyx beads. Tie the ends of the unwanted thread together with a couple of knots to secure the chain, making sure it starts beside the 3rd (last) faceted round onyx bead.


Use the remaining unwanted thread to thread through the U-shaped end of the natural black leather cord, before the concave side of the sterling silver button. Secure it to any horizontal fixture, I secured mine to the back of a chair. Doing so allows the chain to hang with no obstruction behind while we work with it, maximising tension.

Thread the (5.5 metre long) black silk thread through the 1st link of the flat curb chain twice. Continue threading the black silk thread through each link once, and twice for the last link. To prevent the (5.5 metre long) black silk thread from loosening from each link, thread a couple of 4mm faceted round hematite beads.


Now, using the 3.5 metre long black silk thread, cut it into 2 equal halves and fold it in half. Thread the U-shaped end between the 2nd and 3rd (last) onyx beads. Thread the ends of the (3.5 metre long) black silk thread through the U-shaped end and fasten it around the top natural black leather cord. Repeat step 5 for the top part of the flat curb chain. I did this on the clipboard instead of the back of a chair (horizontal fixture). *do note that the 1st image below was taken with the sterling silver oval-shaped button on my right instead of left.*


Neaten the couple of faceted round hematite beads that were threaded onto the bracelet in step 5, making sure the end of the flat curb chain is beside the faceted round hematite bead. Divide the 4 strands of (3.5 metre long) black silk thread into 2. Thread 2 strands of the (3.5 metre long) black silk thread between the end of the flat curb chain and faceted round hematite bead. Thread the other 2 strands of the (3.5 metre long) black silk thread between the 2 faceted round hematite beads. Tie a square knot. Do not trim the excess (3.5 metre long) black silk thread yet.

Repeat step 3 till complete.

Divide the 4 strands of (5.5 metre long) black silk thread into 2. Wrap 2 strands around the bottom leather cord on each side of the last faceted round onyx bead. Flip the "back" of the bracelet to face you, and end the(5.5 metre long) black silk thread with a square knot. Thread the excess loose ends through the last faceted round onyx bead and snip off as close to the bead as possible. Repeat the same with the loose ends of the 3.5 metre long black silk thread, threading them through the 1st faceted round hematite bead of the 2nd section and snip off the excess.


Tie an overhand knot with the loose ends of the natural black leather cord beside the last faceted round onyx bead. Create at least 3 closures, each measuring 1 finger spacing or approximately 1 inch apart between knots. Snip off the excess natural black leather cord ends at an angle. And you're done!


"We hope you guys enjoyed this tutorial and that you will try it out! If you like our tutorial, please show your support by subscribing to our blog, liking our facebook page, adding us to your circle on Google+ and following us on Twitter and Pinterest."
Xoxo, Karen


FOR MORE OF OUR:
DIY PRODUCT REVIEWS, CLICK HERE.
DIY TIPS, CLICK HERE.
DIY CHAN LUU STYLE MEN'S LEATHER WRAP BRACELET TUTORIALS, CLICK HERE.
DIY CHAN LUU STYLE WOMEN'S LEATHER WRAP BRACELET TUTORIALS, CLICK HERE.
I want to make this for a guy, but I don't know his wrist size, is it possible to make it adjustable? Can I also make this into a 3 strand bracelet?
ReplyDeleteWhat company do you get your beads from? I see that where the nuggets and buttons are coming from. Just need to know about the beads. Thanks
ReplyDelete