Hi guys!
We would like to let you know that if you are planning on buying the same kind of Chan Luu style buttons and faceted nuggets that we purchased to create our DIY Chan Luu style leather wrap bracelet tutorials, the supplier has created a special discount coupon code for readers of ice cream when the sky is grey!
We have also just posted our reviews on the Chan Luu style buttons and faceted nuggets.
To find out more about the discount coupon code or our reviews for the Chan Luu style buttons and nuggets, click here.
LEATHER CORD
- 2mm diameter instead of 1.5mm.
Left: men's bracelet 2mm cord; right: women's bracelet 1.5mm cord
- For rustic look, use natural finishing cord.
- Metallic and glossy finishing cords are more durable, compared with natural finishing cord as it tends to soften faster.
- 7 feet length is long enough for 5 wrap based on maximum 2mm bead.
- 3 feet length is long enough for single wrap based on maximum 4mm bead.
- Make your bracelet(s) with supple leather cord(s) as it will be easier to knot and the leather cord surface is less likely to tear.
THREAD
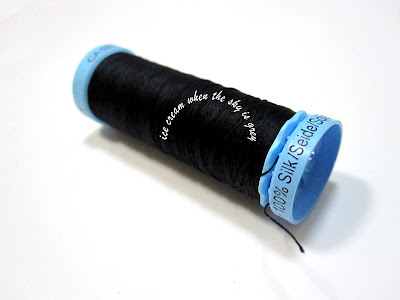
- Use silk thread for sewing of clothes instead of pearl knotting silk thread.
- Silk thread has a soften sheen, whereas polyester and cotton have a "glossier" finish.
- Silk thread is the thickest, followed by polyester, with cotton being the thinnest.
- Cotton frays the most, with polyester being the neatest/ clean looking.
- If the threads don't wrap around the cord neatly, part the leather cords to loosen the wraps slightly, enlarge the loop with the big eye needle and neaten the threads with your finger nail.
- Always try to neaten the threads with the big eye needle as you go along.
- Turning the bead in the correct direction can sometimes, neaten the threads that wrapped around the cord too.
- Always factor in more length for the silk threads than required.
BEADS
- Round or matte finishing are commonly used. But if you're game for faceted, why not?
- Faceted gemstones/ semi-precious stones are less "blingy" than swarovski elements crystals.
- Test kit will be your best friend as it'll prevent snapping of threads while making your bracelet. Create your test kit with a spare 2.125inch big eye needle and 8 threads, thread through the beads that you're going to make into a bracelet. Threadng through the bead with the test kit should be effortless. Any tugging means that the bead hole is too small.
- A set of bead reamers will be nice to have.
- The beads used should be no bigger than 4mm for 5 wrap bracelet.
MISC.
- Single wrap bracelet should take 1-2 hours to complete.
- 5 wrap bracelet would take 4-8 hours to complete.
- Tension is an important factor to creating a beautiful straight bracelet.
- Make sure that the cord is particular to the clipboard and the threads are parallel to the clipboard while tightening the threads that are wrapping around the leather cord.
- Using a clipboard will aid tension while threading on the beads.
- The technique is to thread each bead in a figure-8 method so that every bead sits nicely onto the cord.
- When the bracelet gets too long during the making process, simply fold a piece of tissue a few times to act as a cushion around the bracelet.
"I hope these tips are helpful!"
Love, Karen
FOR ALL OF OUR DIY CHAN LUU STYLE LEATHER WRAP BRACELET TUTORIALS & TIPS, CLICK HERE.


awesome tips! i love!
ReplyDelete