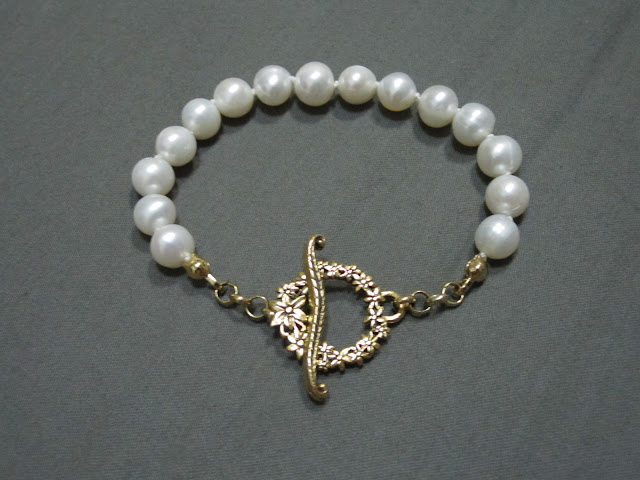
TIFFANY & CO. STYLE FRESHWATER PEARL WITH TOGGLE CLASP BRACELET
About six years back I bought a cultured freshwater pearl necklace. But I've only worn if a couple of times. As I was browsing through Tiffany & Co. jewellery, I saw this beautiful pearl bracelet. It's made with rice-shaped pearls, two short sections of fine sterling silver cable chain, with a sleek and clean-looking bar and heart-shaped ring toggle clasp.
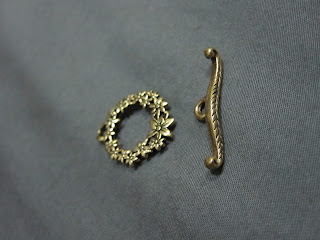
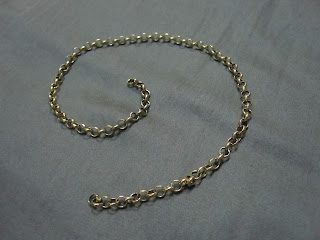
I like the design of their pearl bracelet so much that I've decided to do my own version using my old pearl necklace! My pearls are potato-shaped and are bigger in size. Each of my pearls are approx. 6.5mm, therefore, I've matched them with two short sections of gold-plated rolo chain, with a more intricate floral design bar and ring toggle clasp. Each ring of the rolo chain is approx. 3.5mm, the bar is 25mm long and the ring is approx. 17mm measured across the widest part.
bar and ring toggle clasp
pearls
stretched silk thread (Griffin No. 4, diameter .6mm)
tweezers
rolo chain
2 clam shell beads
clipboard
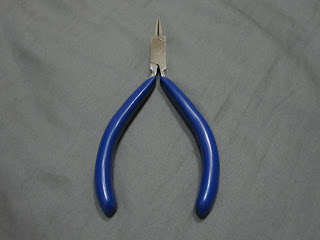
piler(s)
base coat nail polish (seche vite)
or
G-S Hypo cement glue or clear top coat nail polish (seche vite)
*optional*
STEP 1
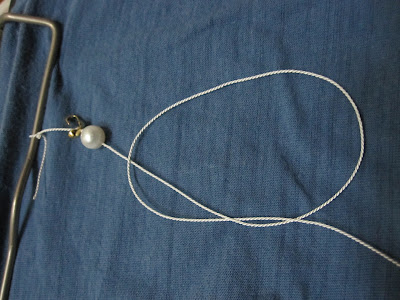
I'm sure some of you out there have tried stringing pearls and it's a pain when the strung pearls start rolling about. (Tip #1: some wastage, a lot less pain.) Secure one end of your stretched silk thread to the clipboard. This way, your strung pearls will not roll around, and it helps a lot when knotting by preventing unwanted excess space between the knots and pearls or findings.
STEP 2
Tie the silk thread in a double overhand knot instead of an overhand knot as it will sit in the clam shell bead.
STEP 3
Frustrated with the end of the silk thread untwining? (Tip #2: no untwine, easy threading.) Paint a generous amount of base coat nail polish to the loose end of the stretched silk thread. As base coat is generally thinner in consistency, it will work better than a top coat as it doesn't add as much thickness to the end of the silk thread.
Wait till the base coat gets tacky (I waited about 15 seconds for my type of base coat), remove the excess nail polish and tighten the twine by twisting the end of your silk thread. By doing so, the end of your silk thread will not untwine. And you'll have a much easier time threading through the pearls if your silk thread doesn't have the needle that comes with it.
STEP 4
While allowing some time for the base coat to completely dry, we will connect the chain to the bar and ring toggle clasp. (Tip #3: seems equal, not necessarily mathematically.) Due to the design of my toggle clasp, I've decided to connect the chain to the bar first, then the ring. Reason being, part of the chain that's connected to the bar will be covered by the thickness of the ring. Therefore, the chain that's going to be connected to the ring will be slightly shorter than the chain that's connected to the bar.
Visually, the two sections of chain should appear to be the same length and the toggle clasp centralised. My two sections of chain plus the toggle clasp measures 40mm in total.
Note that the total length of the toggle clasp with the two sections of chain should not be wider than your wrist. (Tip #4: more is better than less) I actually trimmed the chain to the preferred length after connecting to the bar. Doing it this way, it's easier to determine how long/ short the section of chain should be. Same thing applies to the section of chain that's connected to the ring, trim after it's connected.
STEP 5
Thread through the clam shell bead from the inside out. And tie an overhand knot to secure the clam shell bead, using the same technique as stringing pearls.
STEP 6
Now you can start to string the pearls to your required length and end it with an overhand knot. My wrist is approx. 145mm snug and I used 15 pearls.
STEP 7
After you have gotten the required length of strung pearls, thread a clam shell bead. But this time, thread through the clam shell bead from outside in. End it with a double overhand knot.
STEP 8
(Tip #5: a little excess, double security.) Snip off a couple of millimetres away from the double ended knot. Apply a generous amount of G-S Hypo cement glue or top coat nail polish on both of the double overhand knots that are sitting in the clam shell beads.
STEP 9
Close the clam shell beads with your pliers. This step could be done with or without the cement glue or top coat being completely dried. Then, connect the chain to the clam shell beads. (Tip #6: flat or round?) I prefer to use two types of pliers, a flat-nose and a round-nose. Flat-nose to close the findings, round-nose to hold the finding(s) in place while closing or bending.
(Tip #7: size matters.) Note that the bigger the pearl, the thicker the silk thread so that the knot can hold the pearl in place.
"Hope you find this tutorial helpful and you'll have fun while trying this out. It's a pretty cool bracelet! You can wear it in 3 different ways. Nick and I prefer the 'classic pearl bracelet with a twist' way.
Please subscribe and comment. I'll love to hear your experience, tips and tricks!"
Xoxo, Karen
FOR ALL OF OUR PEARLS RELATED POSTS, CLICK HERE.









Thanks for submitting beautiful information about pearl.,
ReplyDelete