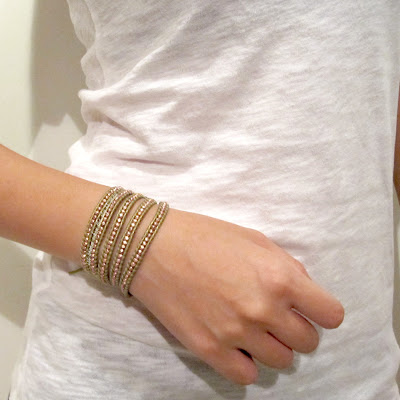
DIY CHAN LUU WOMEN'S STYLE 5 WRAP LEATHER BRACELET: ROSE GOLD FACETED NUGGETS ON TOTA
Hi guys!
We would like to let you know that if you are planning on buying the same kind of Chan Luu style buttons and faceted nuggets that we purchased to create our DIY Chan Luu style leather wrap bracelet tutorials, the supplier has created a special discount coupon code for readers of ice cream when the sky is grey!
We have also just posted our reviews on the Chan Luu style buttons and faceted nuggets.
To find out more about the discount coupon code or our reviews for the Chan Luu style buttons and nuggets, click here.
MATERIALS NEEDED
beige silk thread (22 metres)
2mm faceted rose gold nuggets (277 pieces)
sterling silver oval button (1)
1.5mm tota leather cord (7 feet)
clipboard
2.125 inch big eye needle
Estimated duration: 4-8 hours
Estimated cost for materials: USD32.00
STEP 1: TENSION & PLACEMENT
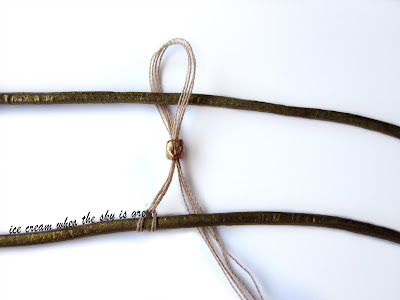
Secure the leather cord with the button onto the clipboard. I did mine with the button facing left and the loose ends of the leather cord facing right. With the leather cord laying across horizontally and secured to the clipboard, you'll have more control and tension when threading the nuggets.
For illustration only. Materials not exact.
STEP 2: POSITION OF 1ST NUGGET
Thread the bottom leather cord through the silk thread loop. Tighten the silk thread loop around the cord about 5-10mm away from the back of the button.
STEP 3: THREADING TECHNIQUE
For illustration only. Materials not exact.
Bring the silk threads behind the top leather cord and thread through the nugget (2nd time) again, so that the silk threads loop around the top leather cord. As soon as your needle is through the nugget for the 2nd time, bring the silk threads behind the bottom leather cord.
By doing so, you'll tighten the silk thread looping around the top leather cord in a figure-8 method that ensures the nugget is seated center to both top and bottom cords.
Repeat this step till you've finished all the nuggets.
TIPS FOR TENSION WHEN DOING STEP 3:
What I like to do, is to make sure the nugget sits as close as possible to the bottom cord before I tighten the silk threads that loop around the top leather cord.
While tightening the silk threads that loop around the top leather cord, I'll also pull the cords taut. So if you were to look at this action for top view, the leather cord will be perpendicular to the top of the clipboard (where the button is secured to), and the silk threads are perpendicular to the leather cord. This way, I'll definitely get a straight bracelet rather than a curvy one.
"Super easy DIY 5 wrap leather bracelet. I really love this colour combination and I hope you'll try it out!"
Love, KarenFor our tutorial on how to start & end your DIY Chan Luu Bracelet, click here.
FOR ALL OF OUR DIY CHAN LUU STYLE LEATHER WRAP BRACELET TUTORIALS & TIPS, CLICK HERE.


No comments:
Post a Comment