
THE PERFECT DIY CHRISTMAS WRAP BRACELET FOR BLUE AND SILVER COMBI LOVERS!
Hi guys!
We would like to let you know that if you are planning on buying the same kind of Chan Luu style buttons and faceted nuggets that we purchased to create our DIY Chan Luu style leather wrap bracelet tutorials, the supplier has created a special discount coupon code for readers of ice cream when the sky is grey!
We have also just posted our reviews on the Chan Luu style buttons and faceted nuggets.
To find out more about the discount coupon code or our reviews for the Chan Luu style buttons and nuggets, click here.
MATERIALS NEEDED
4mm peacock freshwater pearls (48 pieces)
1.5mm natural dark blue leather cord
or
1.5mm natural pacific blue leather cord (7 feet)
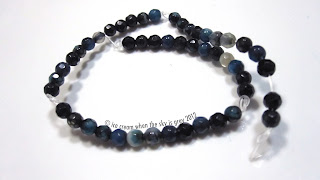
4mm dark blue fire agate
or
4mm onyx and 4mm blue agate (48 pieces)
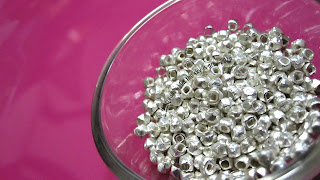
2mm sterling silver nuggets (136 pieces)
sterling silver button (1)
navy blue silk thread (26 metres)
2.125" big eye needle (1)
clipboard (1)
bead reamer *optional*
Estimated duration: 5-8 hours
Estimated material cost: USD45
STEP 1: GETTING STARTED
Thread your leather cord through the button from the concave side.
STEP 2: AID FOR TENSION
Secure your button and leather cord to the clipboard. This will help to provide tension when threading the beads, pearls and nuggets.
STEP 3: SILK THREAD
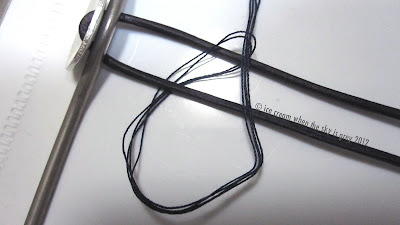
Cut the 26 metre long navy blue silk thread into 2 equal halves. Place them side by side and fold them in half.
For illustration only. Materials shown not exact.
Thread through the big eye needle with the U-shaped end of the silk threads.
For illustration only. Materials shown not exact.
After you have threaded it through the big eye needle, form a loop by folding the U-shaped end towards the loose ends.
Pick up the threads at the part where it forms a "Y". Then, pull the loose ends while still holding on to the "Y" part of the silk threads firmly, yet allowing the threads to slide in between the thumb and index finger.

STEP 4: POSITION OF LEATHER CORD & SILK THREADS
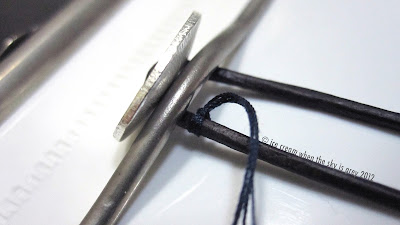
I did my bracelet with the button on the left side while it's secured to the clipboard. Thread the bottom leather through the loop formed with the silk threads.
Tighten the silk threads that loop around the leather cord firmly, about 5mm away from the back of the button (convex side).
STEP 5: STERLING SILVER NUGGETS
Start the design of the bracelet with 17 faceted sterling silver nuggets.
TIP: METHOD OF THREADING BEADS & TRICK FOR SILK THREAD
Do note, what we are trying to do is thread the nuggets/ beads/ pearls in a figure-8 method.
For illustration only. Materials shown not exact.
Position the nugget so that it sits nicely beside the previous one. Support the back of the nugget with your right index finger while pulling the loose ends to tighten the silk thread loop.
Make sure that the leather cords are perpendicular to the top of the clipboard with firm tension while you pull the loose ends of the silk thread.
For illustration only. Materials shown not exact.
Make sure that the leather cords are perpendicular to the top of the clipboard with firm tension while you pull the loose ends of the silk thread.
For illustration only. Materials shown not exact.
I didn't pay enough attention to it, resulting in a "smiling" bracelet. Oh well, lesson learnt.
Top: proper tension. Bottom: improper tension. For illustration only. Materials shown not exact.
If the threads get messed up, simple, part the 2 leather cords and loosen the loop of the silk threads and re-tighten them.
For illustration only. Materials shown not exact.
For illustration only. Materials shown not exact.
If they are just slightly messed up, sometimes, they can be neatened by turning the nugget in the correct direction.
Also, I like to neaten the threads I'm working with, by sliding the big eye needle. This way the loop around the top leather cord is likely to be neat too.
STEP 6: PEACOCK FRESHWATER PEARLS
For illustration only. Materials shown not exact.
STEP 6: PEACOCK FRESHWATER PEARLS
After you have completed threading 17 nuggets, thread 12 peacock freshwater pearls.
Remember to use enough tension, each time you tighten the silk thread.
Top: proper tension. Bottom: improper tension = sad bracelet. For illustration only. Materials shown not exact.
My experience with smaller pearls is that the hole tends to be smaller. It'll be handy to make your own test kit with 10 strands of silk threads threaded through another big eye needle. Thread the test kit all the way through the pearls that you will be working with. By doing so, your silk threads are less likely to snap while doing the bracelet.
STEP 7: STERLING SILVER NUGGETS
After you have finished threading 12 pearls, thread 17 nuggets.
STEP 8: DARK BLUE FIRE AGATE BEADS OR ONYX & BLUE AGATE BEADS MIX
Once you have finished threading 17 nuggets, thread 12 dark blue fire agate beads or onyx and blue agate mix.
TIP: TENSION WHEN WORKING WITH LONG BRACELET
By now you should have achieved quite a decent length of bracelet that makes it difficult to have good tension on the leather cords, while you tighten the silk thread loop. What I did, was to fold 2 pieces of tissue a few times to form a cushion, and place the bracelet right in the middle. This way, the clipboard will not dent or damage the bracelet.
For illustration only. Materials shown not exact.
STEP 9: REPEATING THE DESIGN
After you are done with 12 agate beads, repeat Steps 5, 6, 7 and 8 respectively till complete.
STEP 10: ENDING THE SILK THREADS
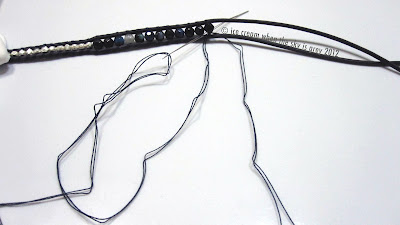
To end the silk threads, I divided the 4 strands of silk threads into 2.
Thread the left 2 strands of silk thread in between the last 2 beads. Repeat the step for the right 2 strands of silk threads on the right side of the last bead.

End it with a square knot.
After knotting, gather the 4 strands of silk threads and thread them through the last bead.

Snip off the excess threads as close to the last bead as possible.

STEP 11: ENDING THE LEATHER CORD & MEASUREMENTS
End the leather cords with an overhand knot beside the last bead.

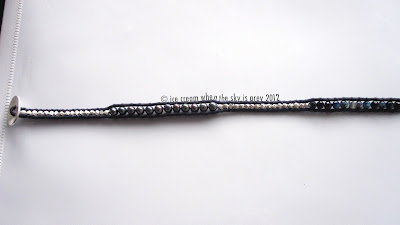
The start of each knot till the next should measure approximately an inch.


The length of the bracelet should be approximately 31 inches, measuring from the back of the button to the start of the first knot.
And you're done!
"I hope you'll find this tutorial helpful. Have fun!"
Xoxo, Karen
FOR ALL OF OUR DIY CHAN LUU STYLE LEATHER WRAP BRACELET TUTORIALS & TIPS, CLICK HERE.










Very good tutorial. Thanks!
ReplyDeleteBest tutorial I've found,Thanks!!!
ReplyDelete